Ethernet Device Functions
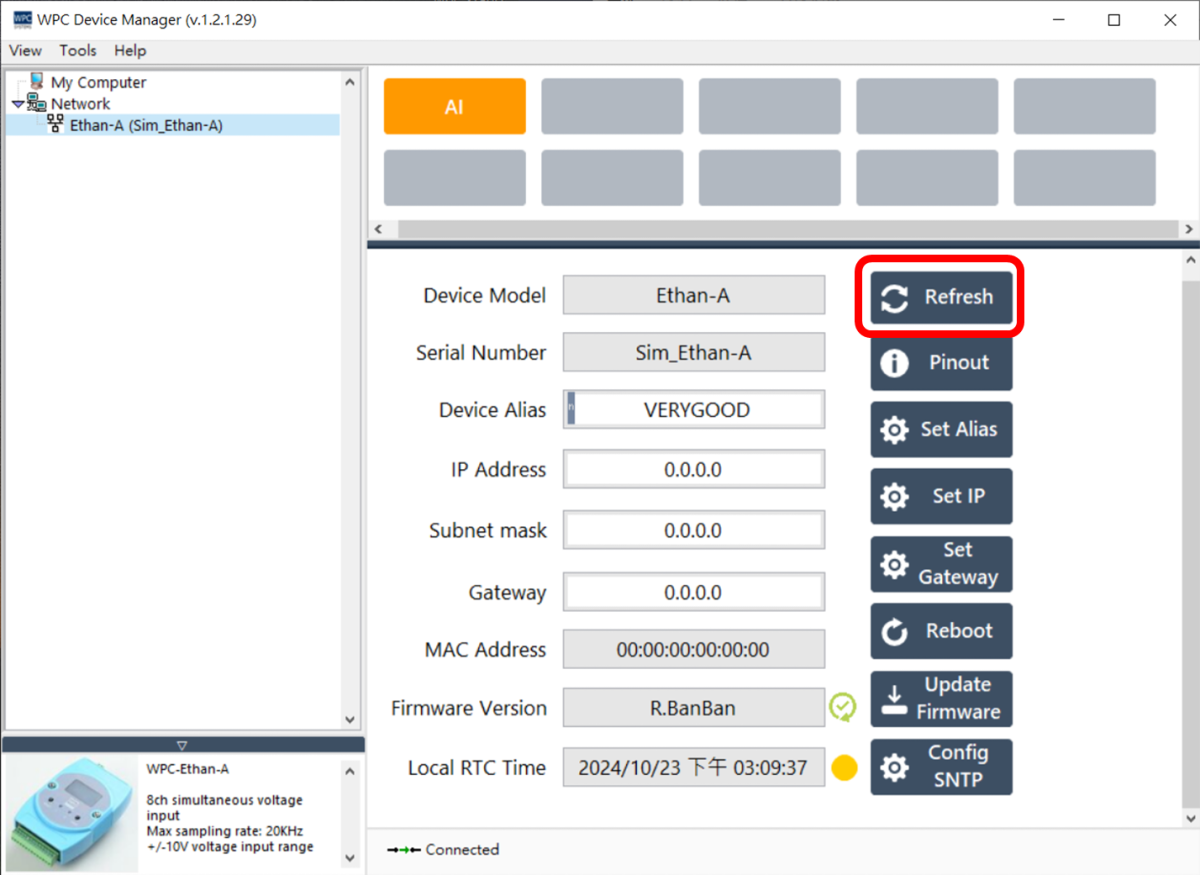
Refresh
Click the "Refresh" button to re-read and update Ethernet device information.
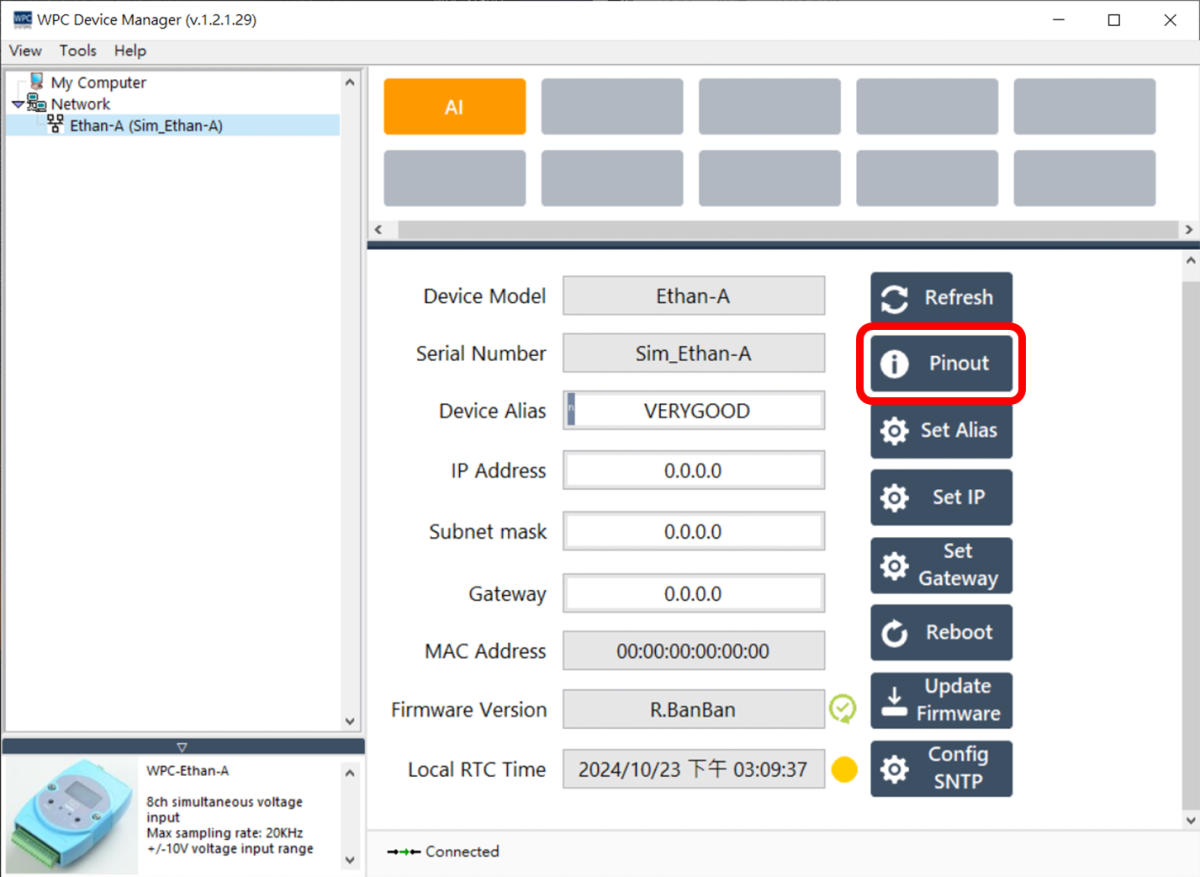
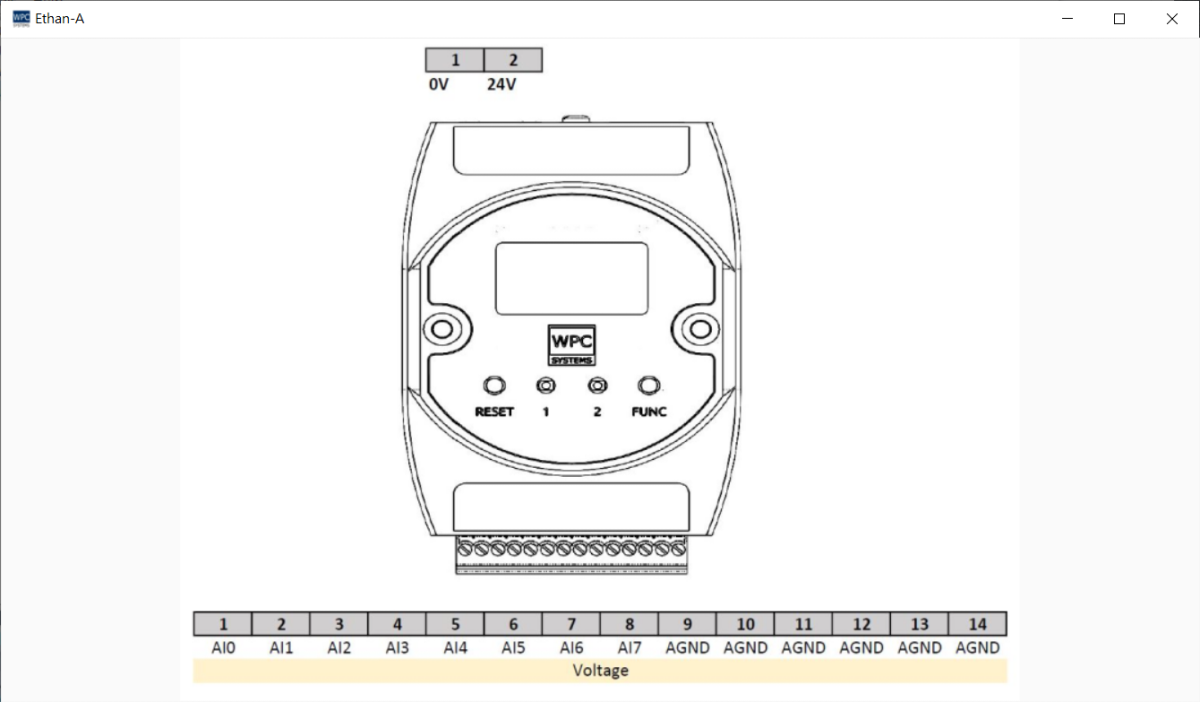
Pinout
Click the "Pinout" button to display the pinout diagram. The window size can be adjusted based on the user's requirements.
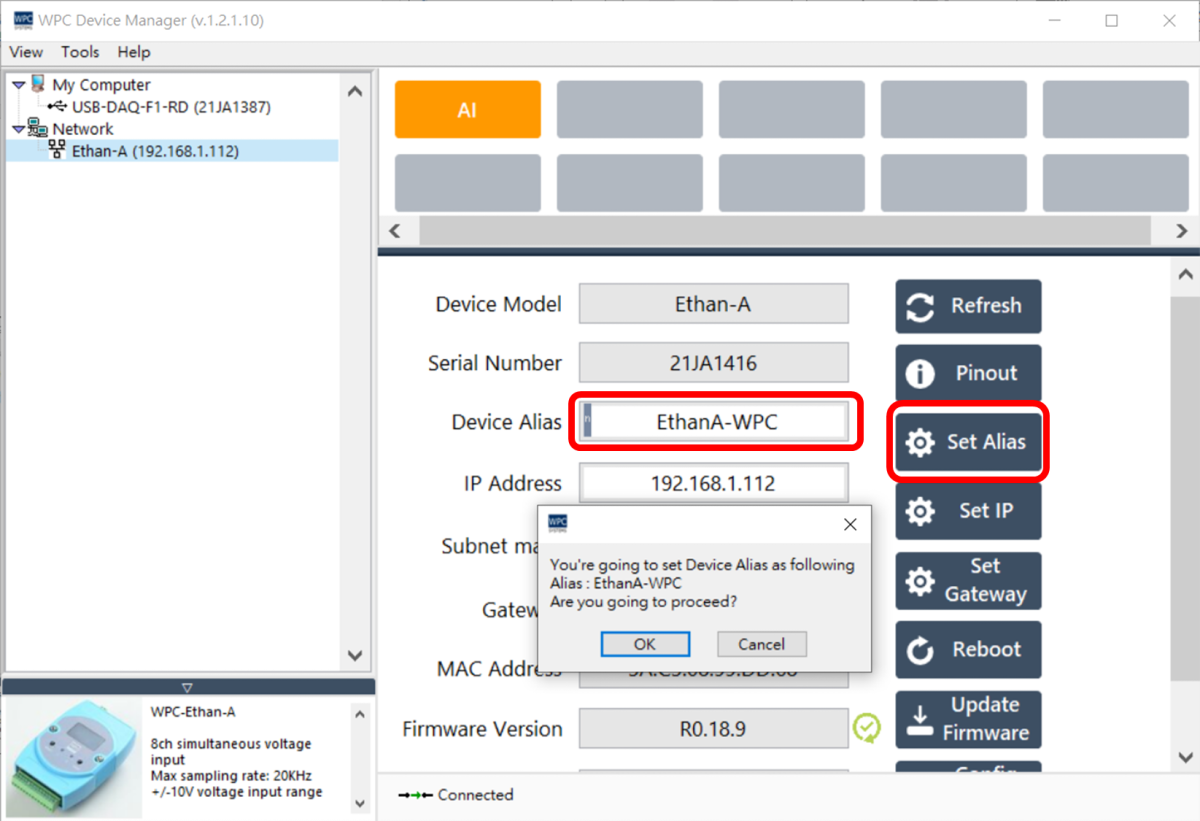
Set Alias
If multiple devices of the same model are connected to the system simultaneously, aliases can be set to distinguish among them.
Operating Steps:
- Enter the desired name in the Device Alias field (e.g.,
EthanA-WPC). - Click the "Set Alias" button.
- After confirming the name is correct, click "OK".
- The system will prompt that the device needs to be rebooted to apply the settings; please click "OK".
- After the device reboots, the name in the device list on the left will be updated to EthanA-WPC.
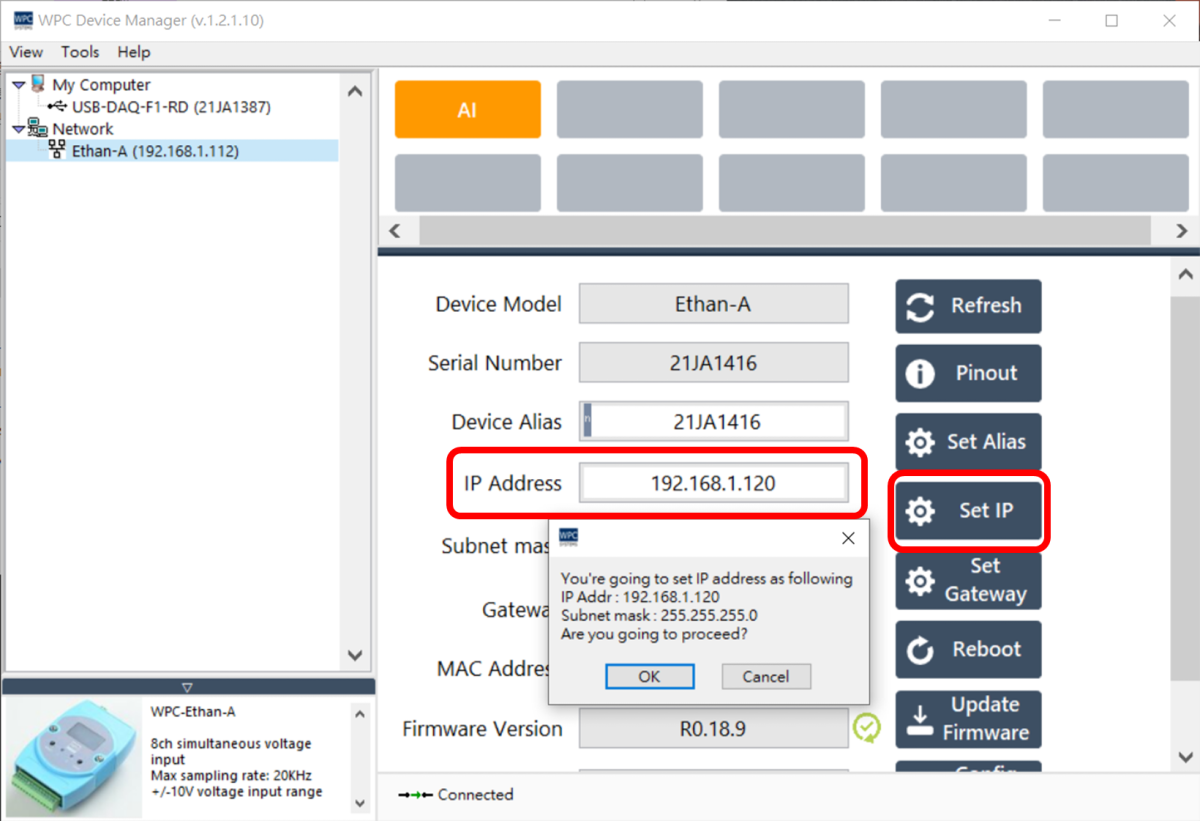
Set IP Address
The steps to change the device IP address are as follows:
- Enter the new IP address in the IP Address field (e.g.,
192.168.1.120). - Click the "Set IP" button.
- After confirming the IP address is correct, click "OK".
- The system will prompt that the device needs to be rebooted to apply the settings; please click "OK".
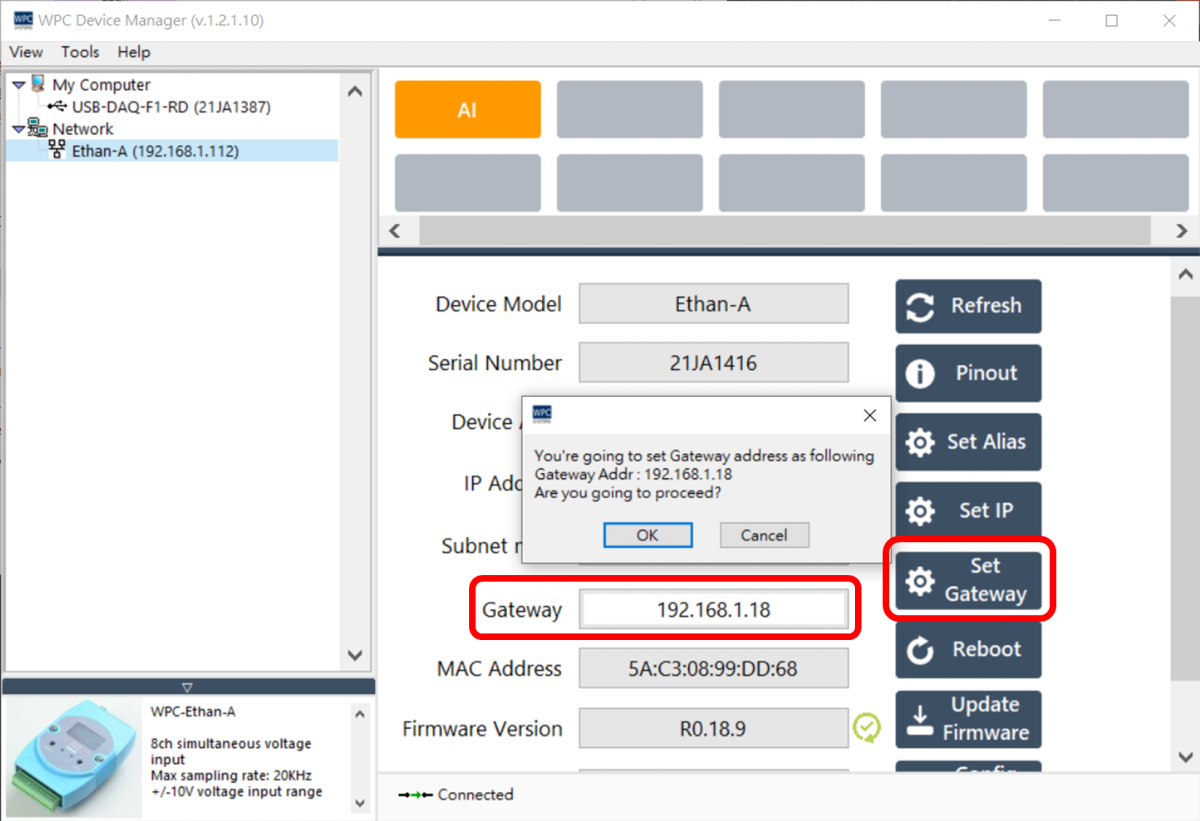
Set Gateway
The steps to change the device's default gateway are as follows:
- Enter the gateway IP in the Gateway field (e.g.,
192.168.1.18). - Click the "Set Gateway" button.
- After confirming the gateway IP is correct, click "OK".
- The system will prompt that the device needs to be rebooted to apply the settings; please click "OK".
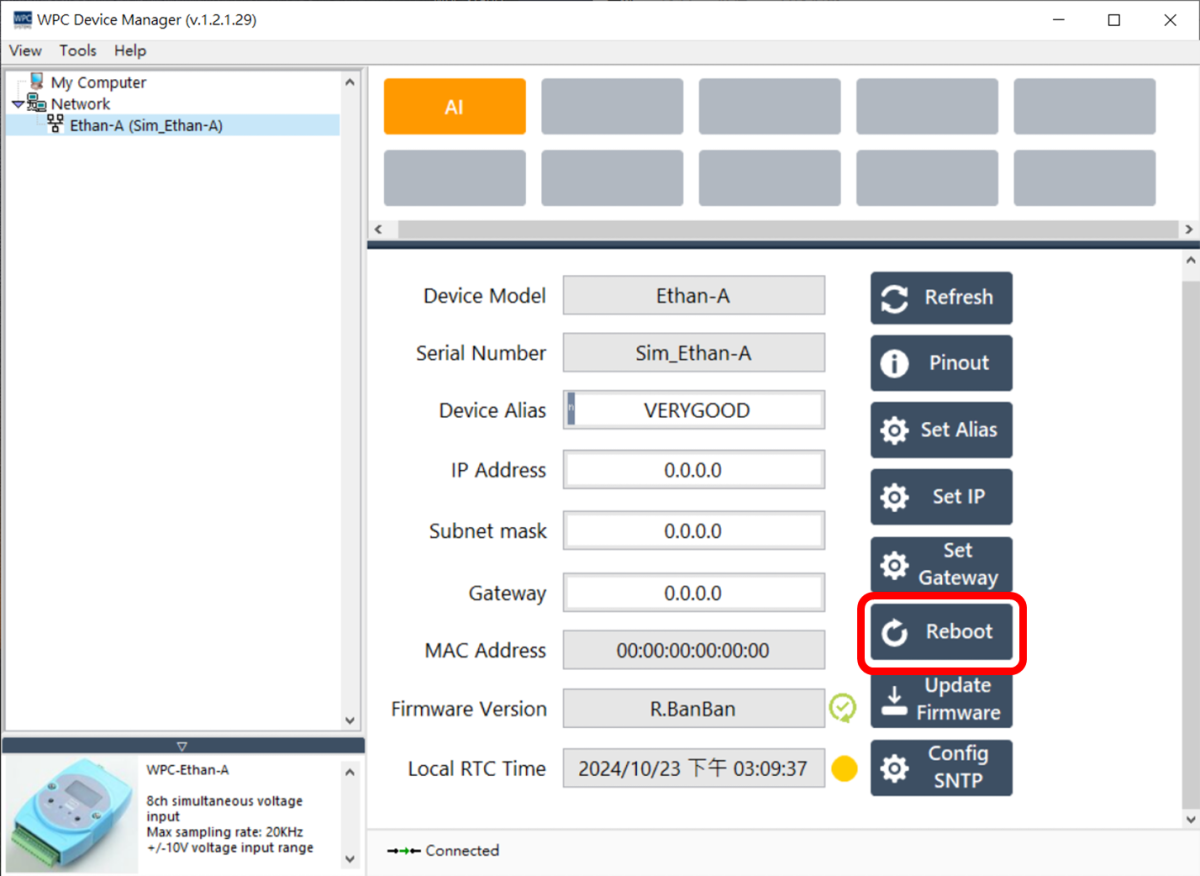
Reboot
To reboot the device via software, please click the "Reboot" button.
Update Firmware
To update the Ethernet device firmware, please follow these steps:
-
Click the "Update Firmware" button.
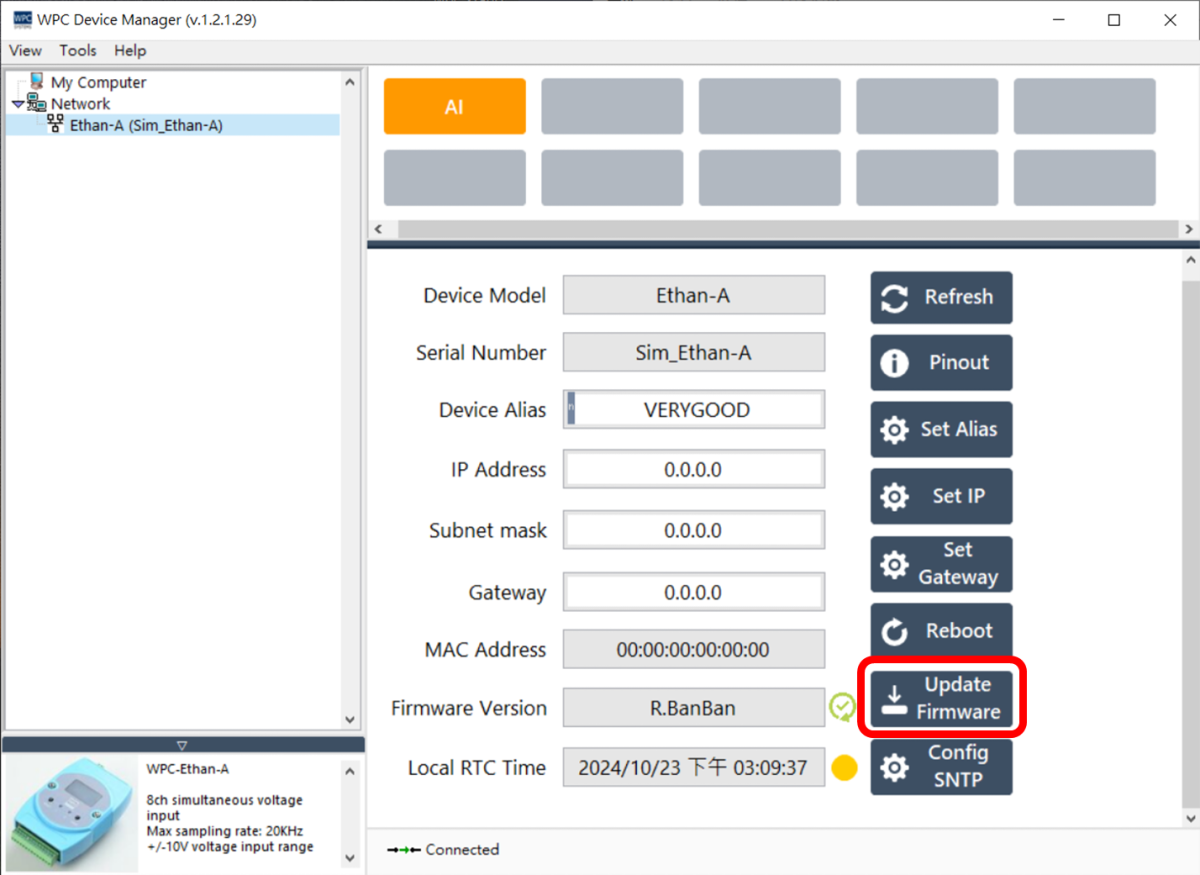
- ⚠️ Icon: Indicates that the current firmware version is outdated.
- ✅ Icon: Indicates that the current firmware is up to date.
-
Select the corresponding firmware file (
.bin) from the file browser.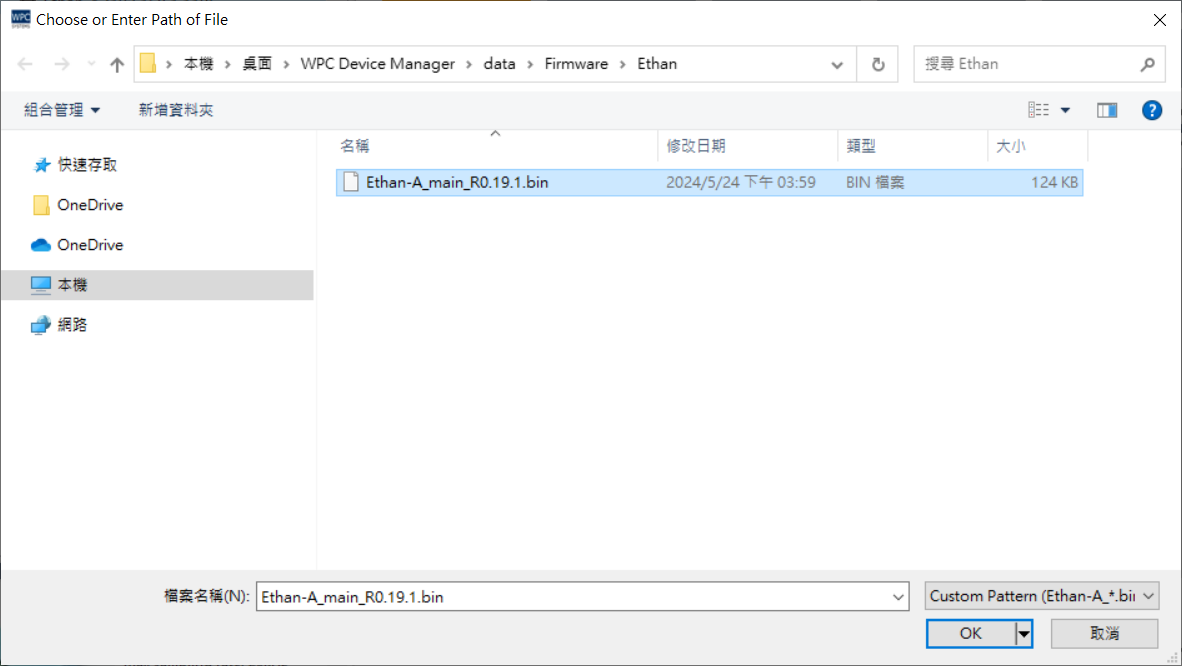
-
A confirmation window will pop up; click "OK" to start writing.
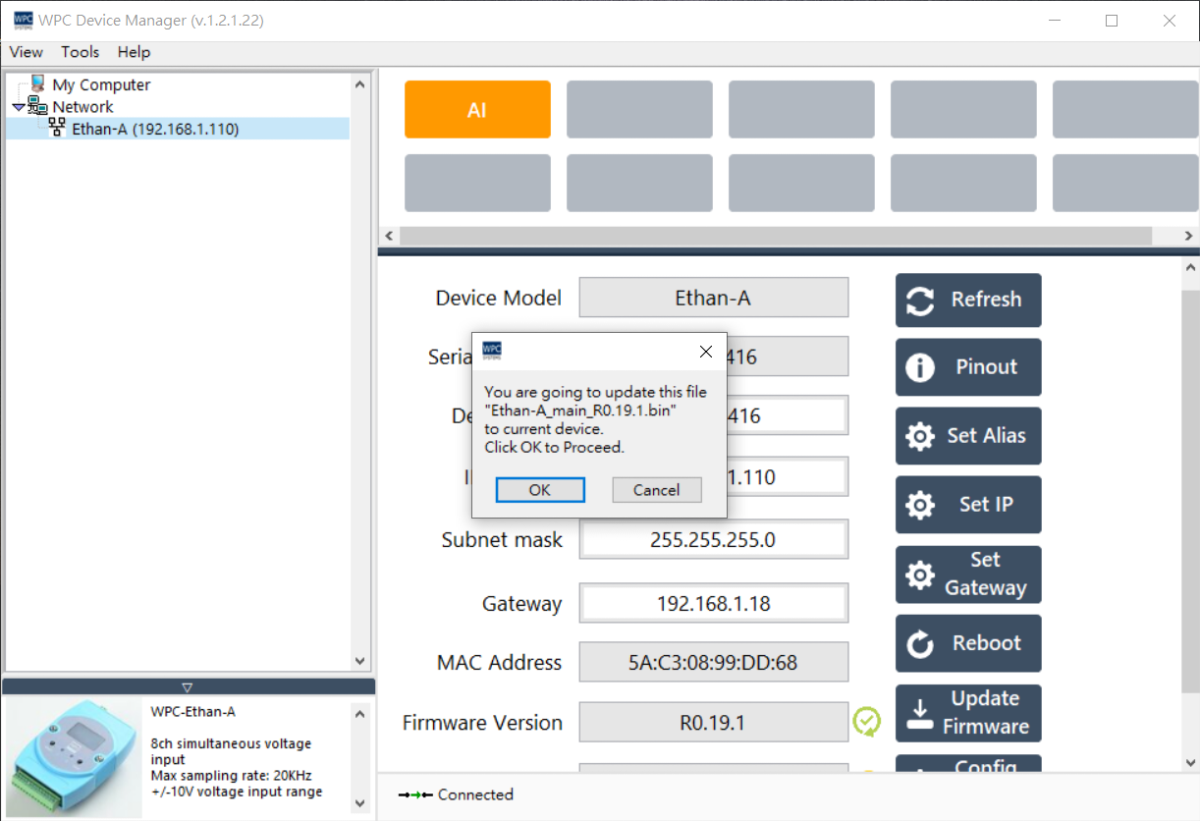
-
Wait for the progress bar to complete.
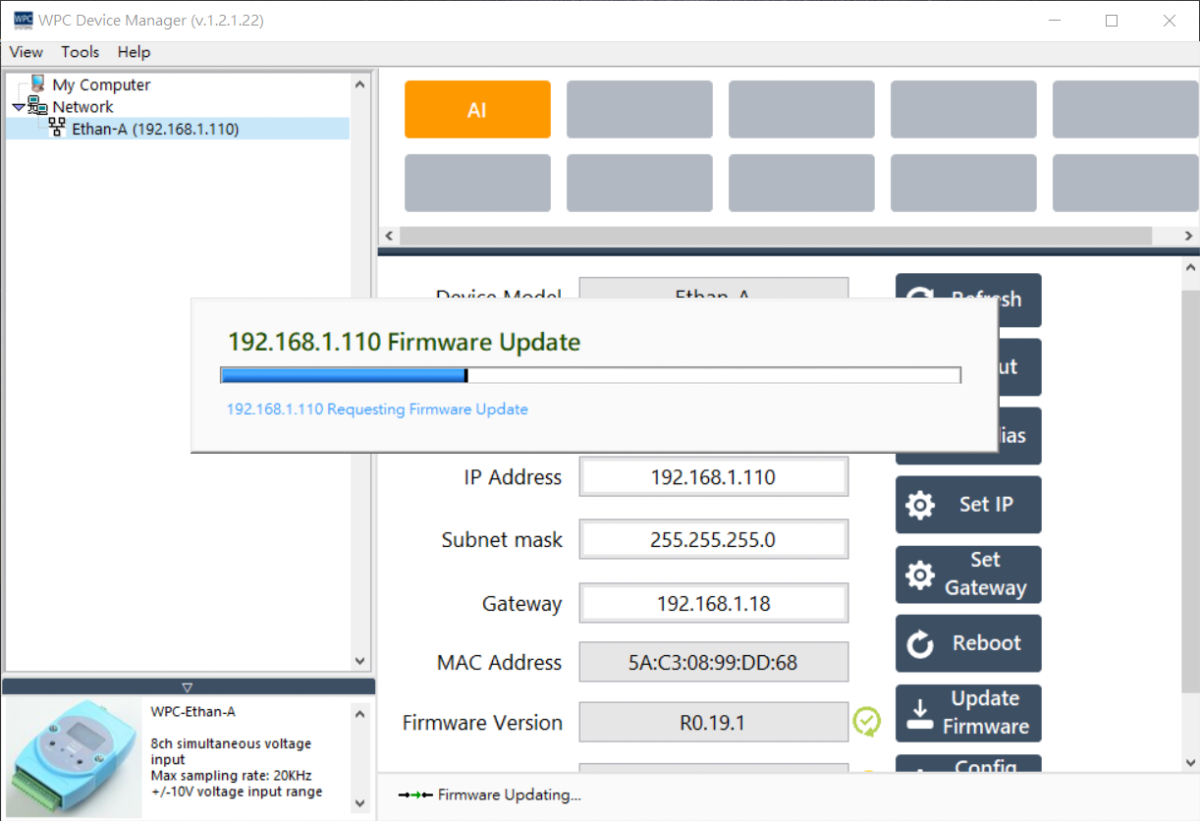
Do not turn off the power or disconnect the network during the update process. If the update fails due to interruption, the device may malfunction and need to be returned to the factory for repair.
Set SNTP
Configuring the Simple Network Time Protocol ensures device time synchronization.
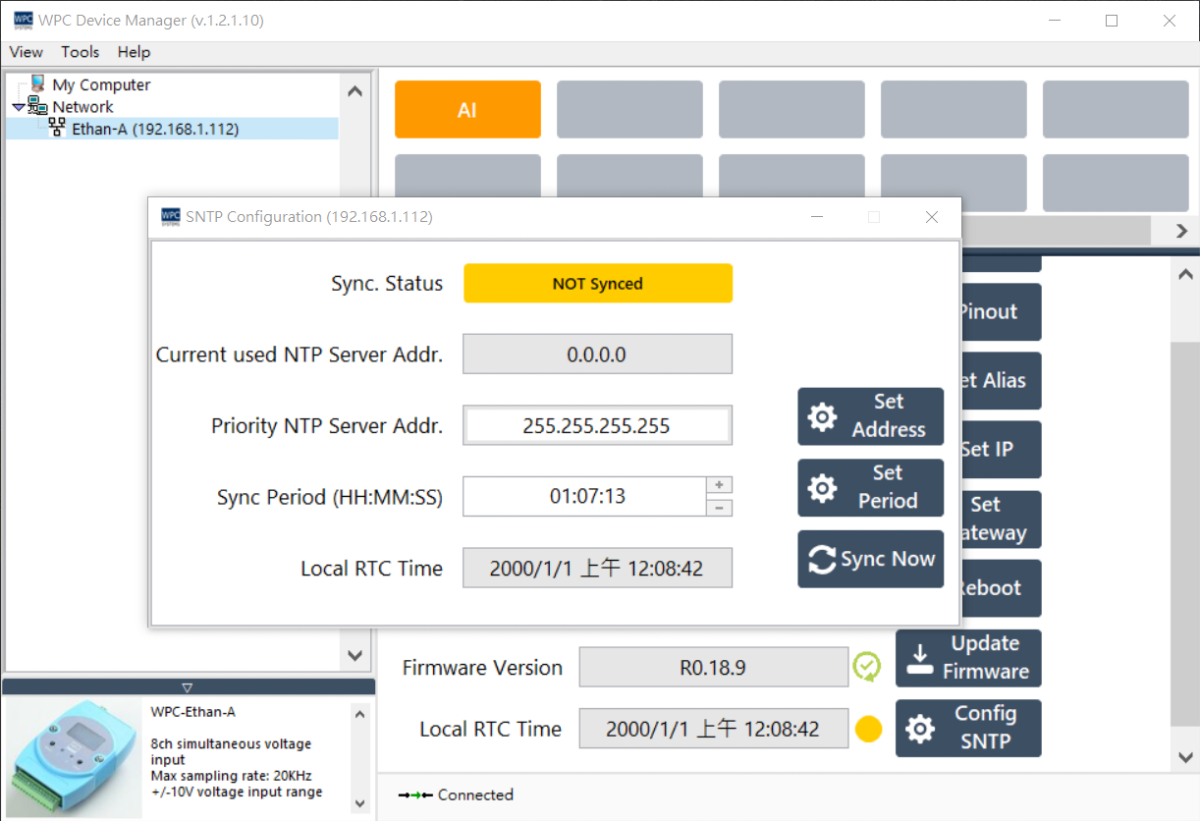
SNTP supports the following two configuration modes:
-
Connect to a Public NTP Server Pool
- Set the server address to
255.255.255.255. - Prerequisite: The device must have internet access.
- Set the server address to
-
Connect to a Private NTP Server
- Set the server address to the IP address of that server.
- Prerequisite: The NTP server must be in the same subnet as the WPC device or reachable via a router.
When setting the IP, Submask, and Gateway, please ensure the network parameters comply with logical specifications.