Changing Wi-Fi Settings (Using WDM)
If your WIFI-DAQ is already connected to a router (Station Mode) but needs to be changed to connect to another router (e.g., from "WPC Systems 1" to "WPC Systems 100"), you can quickly switch to AP mode for configuration via the WDM (WPC Device Manager) tool.
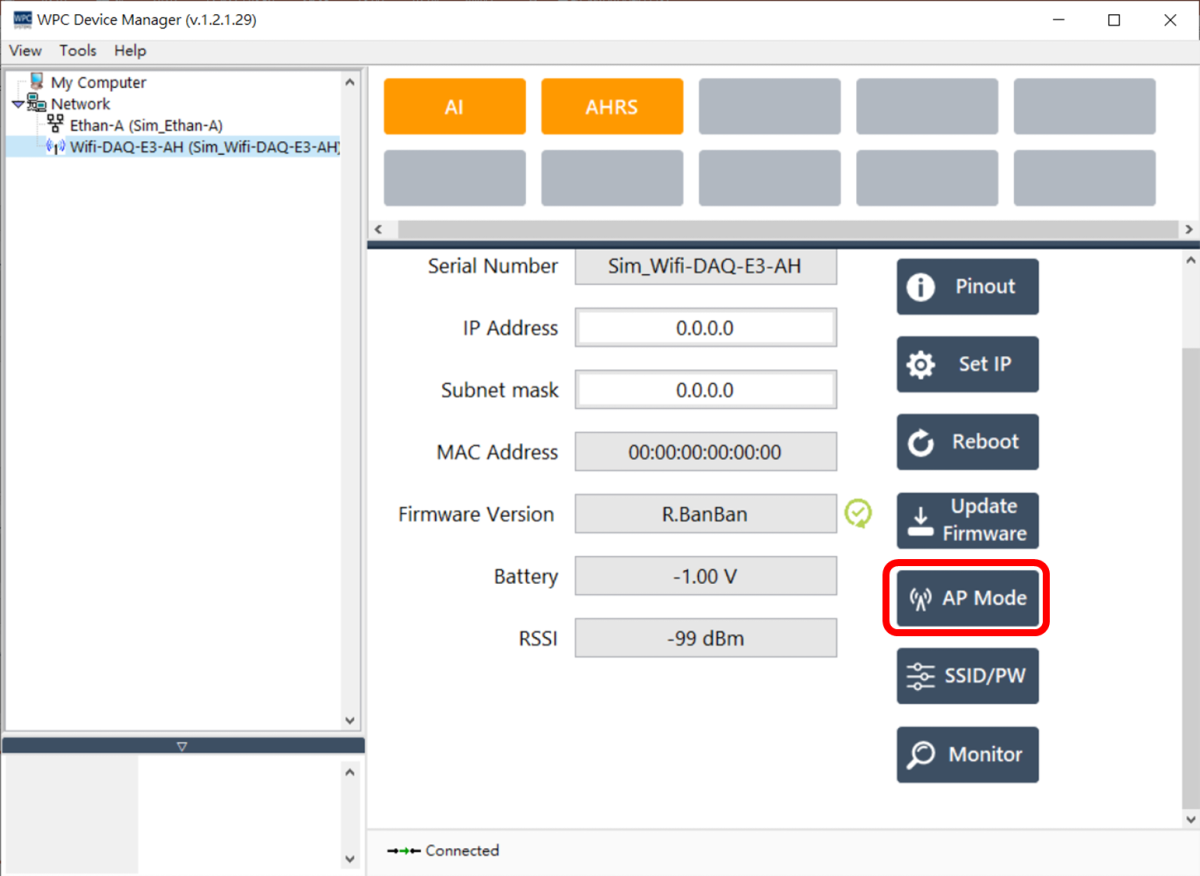
Step 1: Enable AP Mode
First, open the WDM software, find your WIFI-DAQ device in the list, and click the AP Mode button on the right.
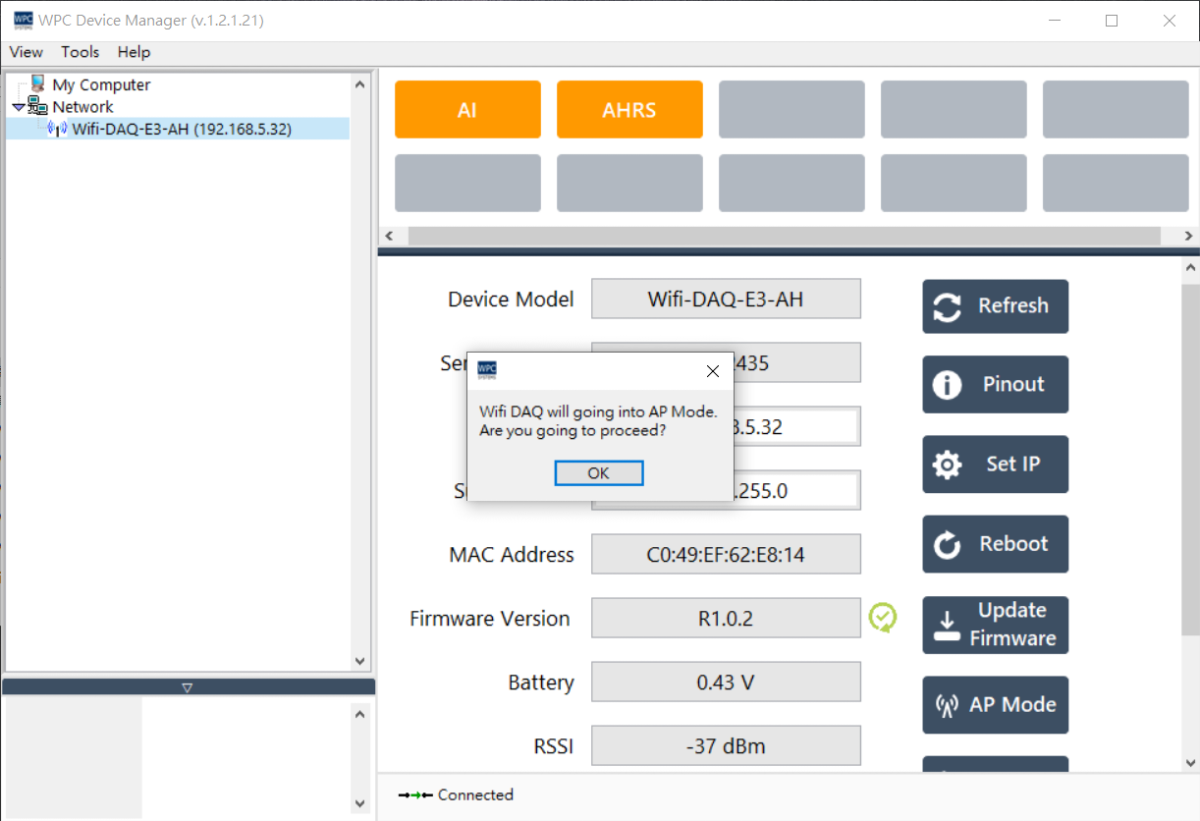
Step 2: Confirm Execution
WDM will pop up a window asking for confirmation to switch to AP mode. Please click OK to continue.
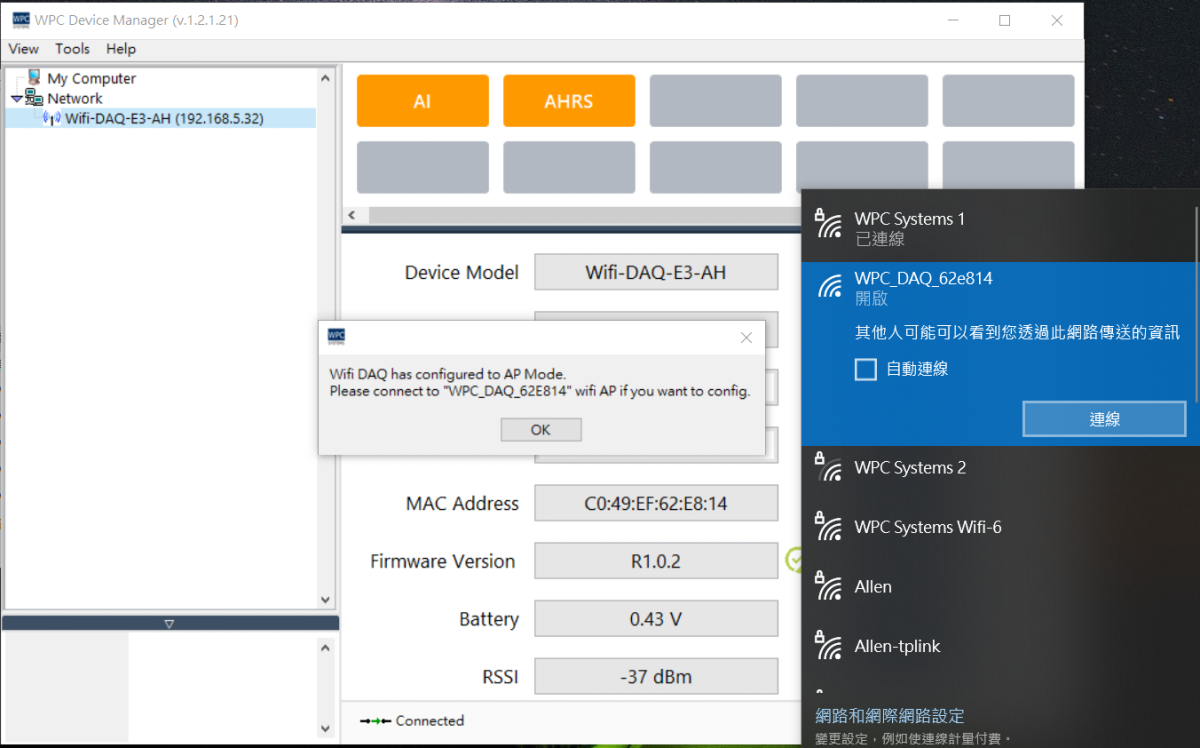
Step 3: Connect to Device Hotspot
WDM will then prompt you to switch your computer's Wi-Fi connection to the WIFI-DAQ hotspot (AP). Manually connect your computer to the corresponding device AP, then click OK in the dialog box.
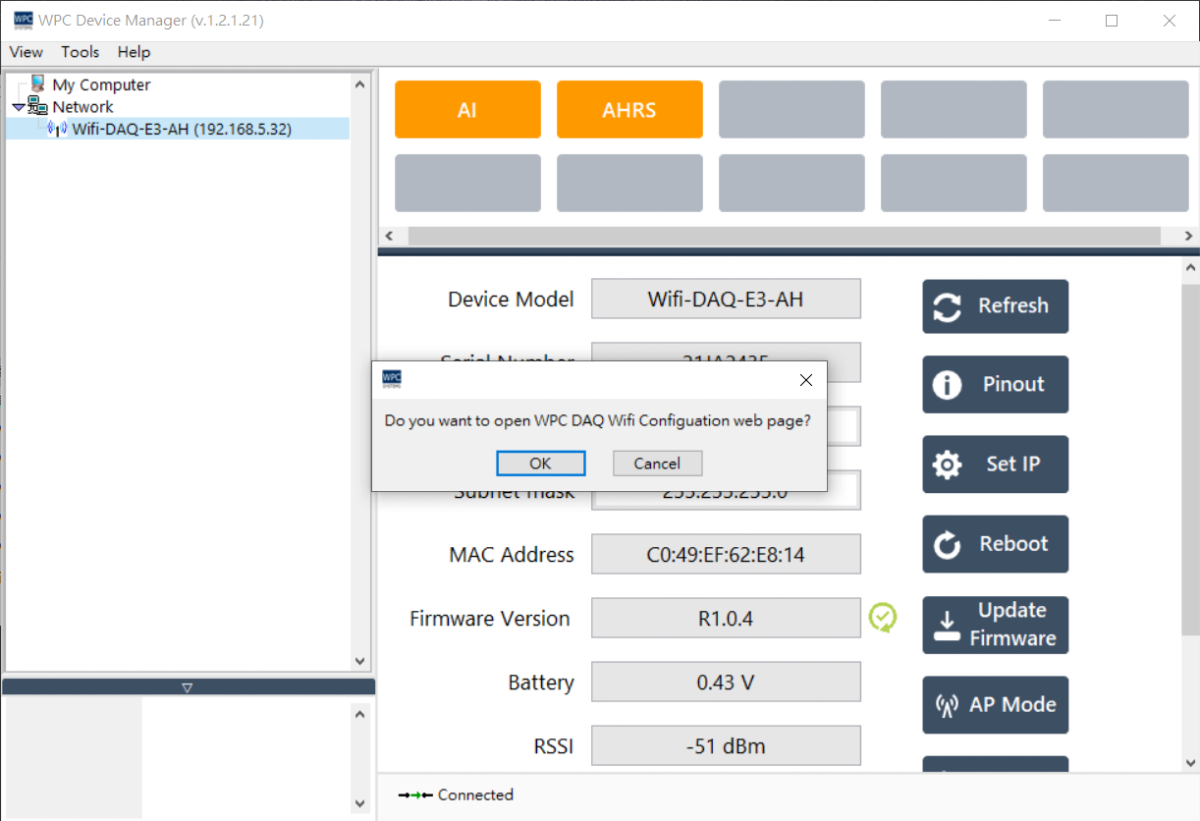
Step 4: Automatically Enter Configuration Page
After clicking OK, WDM will automatically open your web browser and redirect to the WIFI-DAQ configuration page (192.168.4.1).
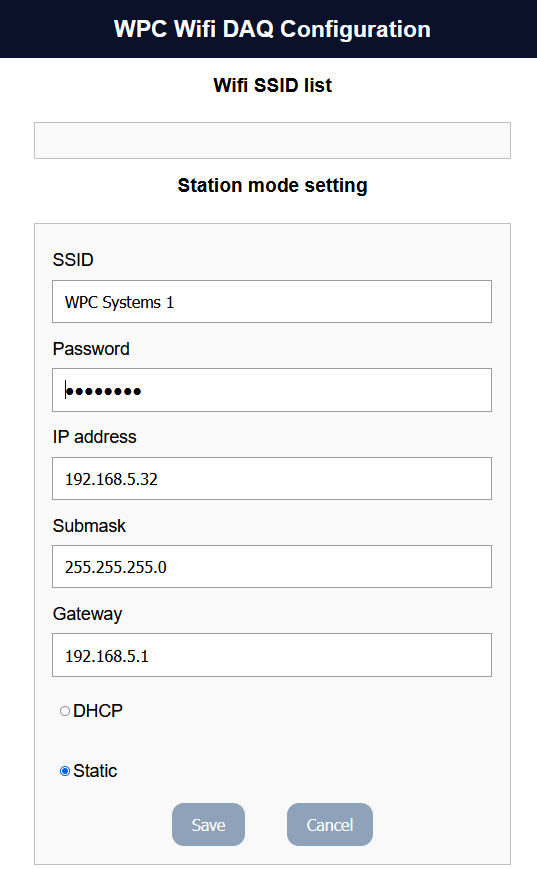
Step 5: Configure New Wi-Fi
Once on the page, please follow these steps to connect to the new router:
- Select the new router SSID (e.g., "WPC Systems 100") from the list.
- Enter the Wi-Fi password for that router.
- Click Save to store the settings.
Step 6: Restart the Device
After clicking Save, the device will automatically restart and attempt to connect to the new router. Observe the LED indicators after restart; if they turn blue or green, the switch was successful.