Network Connection Setup (AP Mode)
If your WIFI-DAQ cannot connect to the default router (e.g., when changing environments or for first-time use), the device will automatically enter AP Mode (Access Point Mode). Please follow the steps below to reconfigure the network.
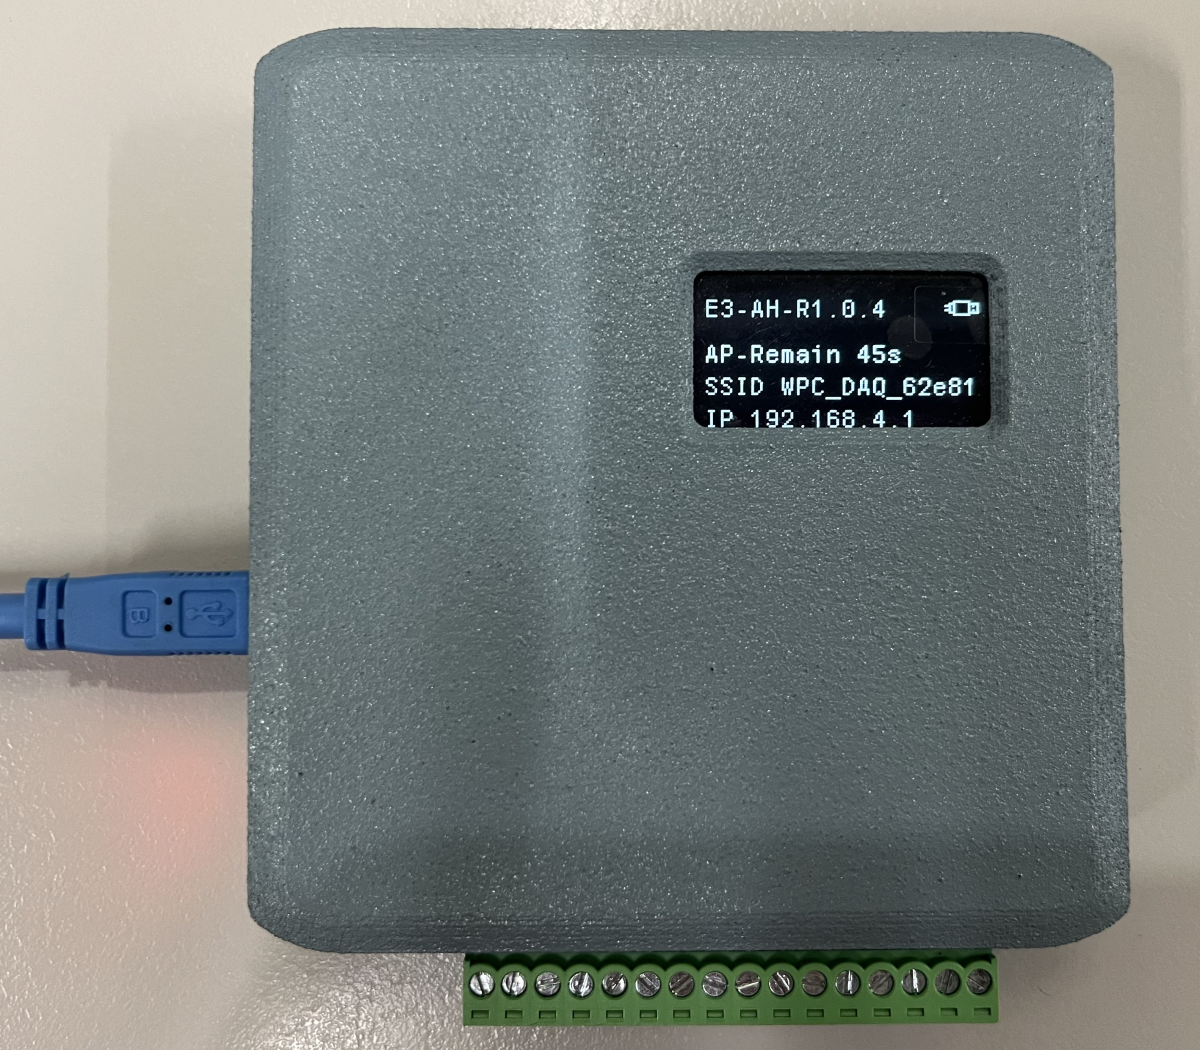
Step 1: Verify Device Status
If the WIFI-DAQ displays a solid red LED after power-up, it means the device is in AP mode, waiting for configuration.
Step 2: Connect Computer to Device
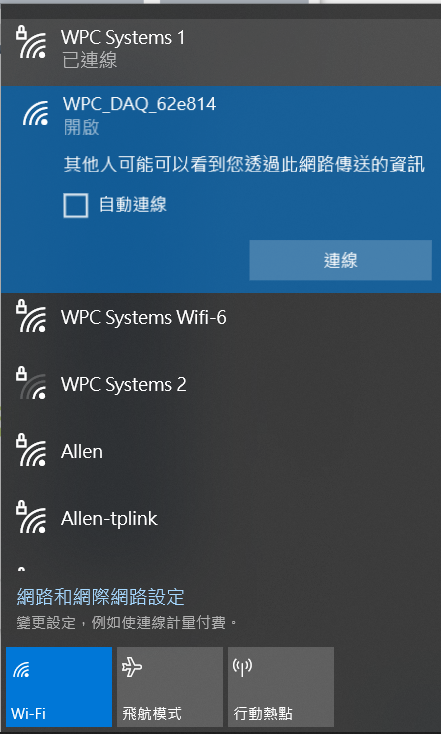
- Open your computer's Wi-Fi list.
- Search for and connect to the network named
WPC_DAQ_xxxxxx(xxxxxx is the unique device identifier, e.g.,WPC_DAQ_62e814).
tip
It is normal for the computer to be unable to access the internet at this time; please maintain the connection to access the configuration page.
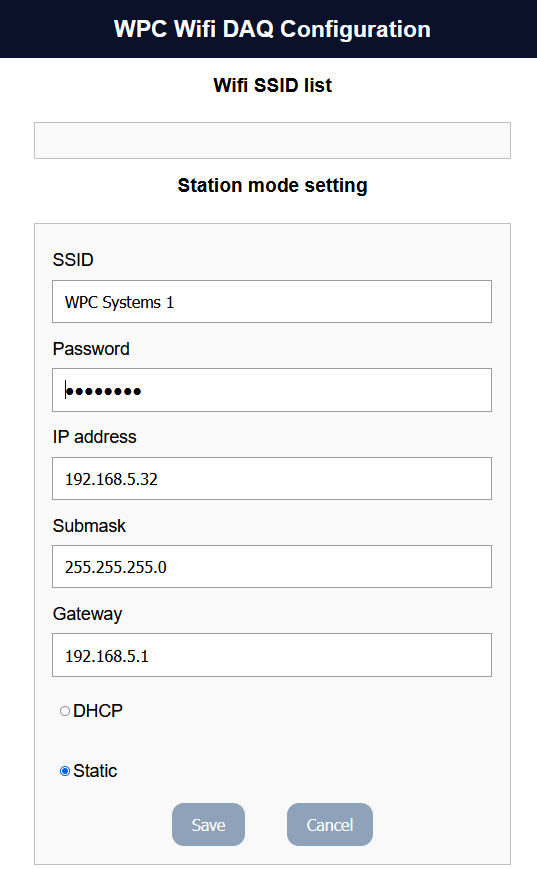
Step 3: Enter Configuration Page
- Open a web browser (Chrome, Edge, etc.).
- Enter
192.168.4.1in the address bar and press Enter. - You will see the WIFI-DAQ configuration interface.

Step 4: Configure Wi-Fi
- Select the router (SSID) you want to connect to from the list.
- Enter the Wi-Fi password.
- Click Save to store the settings.
warning
- Ensure the Wi-Fi password entered is correct.
- WIFI-DAQ only supports the 2.4GHz frequency band; do not connect to a 5GHz network.
Step 5: Restart the Device
After completing the configuration (clicking Save), the WIFI-DAQ will automatically restart.
- After power cycling, if the configuration is successful, the LED will turn green (standby) or blue (connected).
- If the LED remains red, please repeat the steps above and check if the Wi-Fi password was entered incorrectly.
info
For a detailed explanation of the LED indicators, please refer to Appearance and LED Status.