Battery Charging Tutorial
Battery Charging Tutorial
Introduction
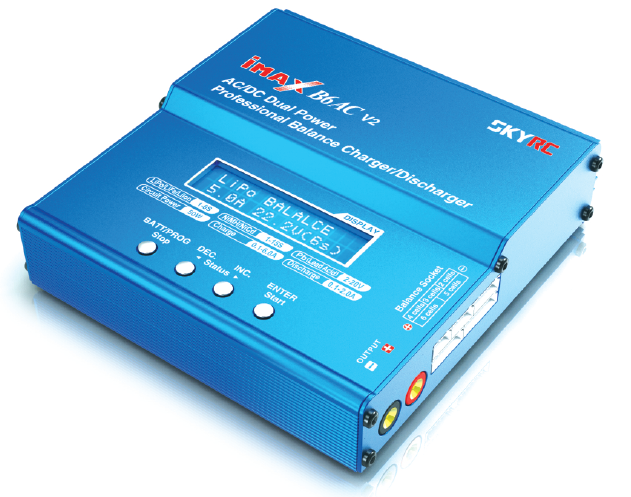
The iMAX B6AC v2 is a processor-controlled charger compatible with most batteries, including:
- Lithium-Polymer (LiPo)
- Lithium-Ion (LiIon)
- Lithium iron phosphate (LiFe)
Maximum charging current up to 6A or maximum power 50W.
Battery Wiring
The battery charger kit includes a battery charger, power cord, and several charging adapter cables.
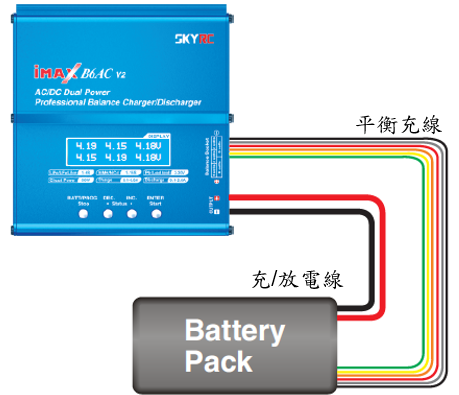
Battery wiring diagram. Taken from the iMAX B6AC V2 Manual.
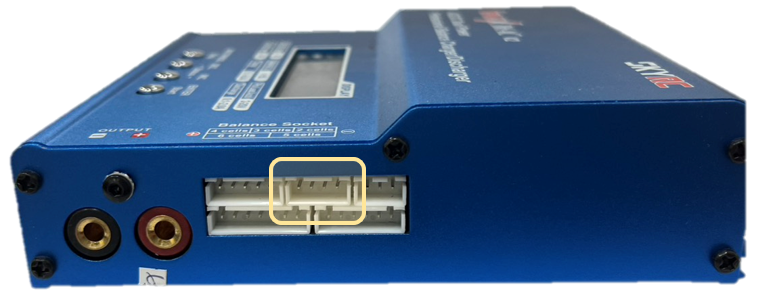
3S Battery Balancing Cable Location
Charging/discharging the battery requires connecting the battery's charging/discharging cable and balancing cable to the charger, as shown in the image above.
Battery Types
The iMAX B6AC v2 supports battery types including LiPo, LiIon, etc.
Battery Type
Switching Battery Type:
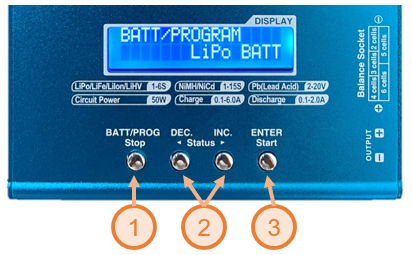
- Press the BATT/PROG button to enter battery type mode.
- Press the left and right buttons to switch battery types.
- Press the ENTER button to confirm the selected battery type.
Charging
The WPC Drone uses 3S batteries, meaning a battery pack of 3 batteries connected in series.
Therefore, the correct charging mode, charging current, and charging voltage need to be set to charge the battery.
Select Balance Charging Mode

Select Balance Charging Mode
Press the left and right buttons on the initial screen to switch between charging and discharging modes.
For Lipo batteries, it is recommended to use Balance charging mode (BALANCE CHG).
Setting the Charging Current
Setting the Charging Current
- Press the ENTER button once on the initial screen. You will see the number below the Lipo logo flashing.
- Press the left and right buttons to set the charging current to 2.0A.
- Press the ENTER button twice to complete the setting.
Setting Battery Voltage
Setting Battery Voltage
- Press the ENTER button twice on the initial screen. You will see the number —.-V (-S) flashing.
- Press the left and right buttons to set the number to 11.1V (3S).
- Press the ENTER button once to complete the setting.
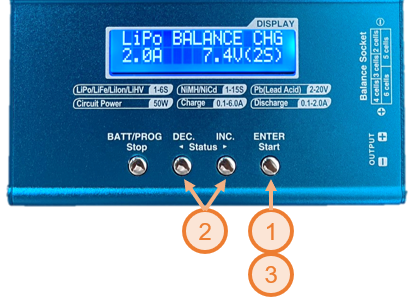
Starting Charging
Start Charging
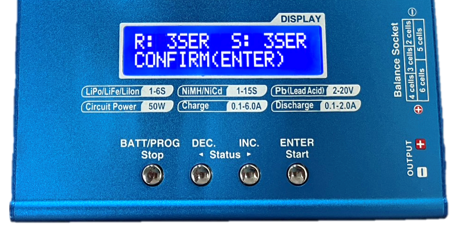
Confirmation Screen
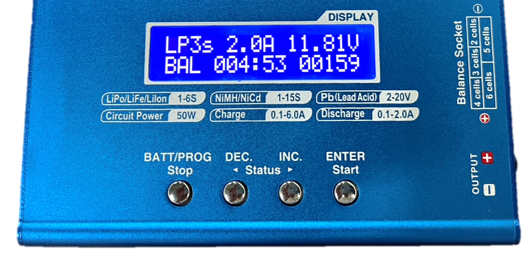
Charging
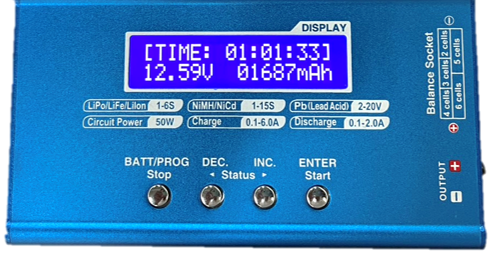
Charging Complete
- Press and hold the ENTER button on the initial screen.
- After seeing "CONFIRM (ENTER)", briefly press the ENTER button again to start charging.
- After charging is complete, you can see the total charging time, battery voltage, and charge amount.
Storage
If the battery will not be used for an extended period, it is recommended to discharge it to a storage voltage of 3.8V/cell for better long-term preservation.
- Setting Mode
- Press the left and right buttons on the initial screen to set the mode to STORAGE.
- Setting Current
- Press the ENTER button once on the initial screen. You will see the numbers below the Lipo logo flashing.
- Press the left and right buttons to set the charging current to 2.0A.
- Setting Voltage
- Press the ENTER button again. You will see the numbers —.-V(-S) flashing.
- Press the left and right buttons to set the number to 11.1V(3S).
- Press the ENTER button once to complete the setting.
- Discharging
- Press and hold the ENTER button on the initial screen.
- After seeing the CONFIRM (ENTER) logo, press the ENTER button briefly to begin discharging.